Have you ever wondered what to do with all those files that come in a folder from Crane when you call them and ask for the latest software? Well, you're not alone. Up until now, written instructions from Crane have not been particularly helpful, nor do they list the different uses of the software you receive.
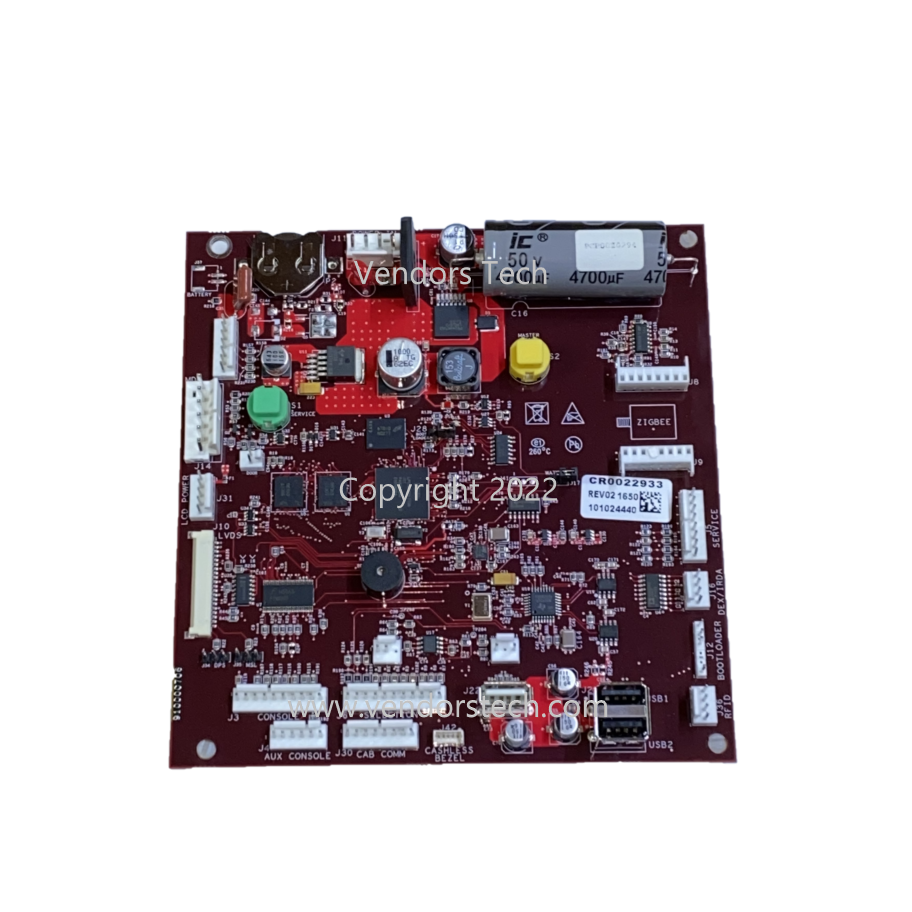
First off, ALWAYS ask whoever is sending you software to include the update full prompt. It will come as a file that is sized at 0 KB, and is seemingly useless, but it's one of the best friends you'll ever have when working on an Atlas "G" board. What is an Atlas "G" board you may ask? Well, it's the 1st generation of control boards used in Crane's Media line of vending machines, they are generally red (though I think early versions may have been green), and they look like this:
The current version of the Atlas board (as of 2022) is known as an "H" board, it's generally green, and it is what powers Crane's latest Media2 update from the G board "Media1" platform. We won't be dealing with the H boards in this post, that will come later.
When software is sent to you by Crane, it comes as a link that expires in a few days to a folder within a database that will contain all your files. Download this folder, and unzip it on your desktop.
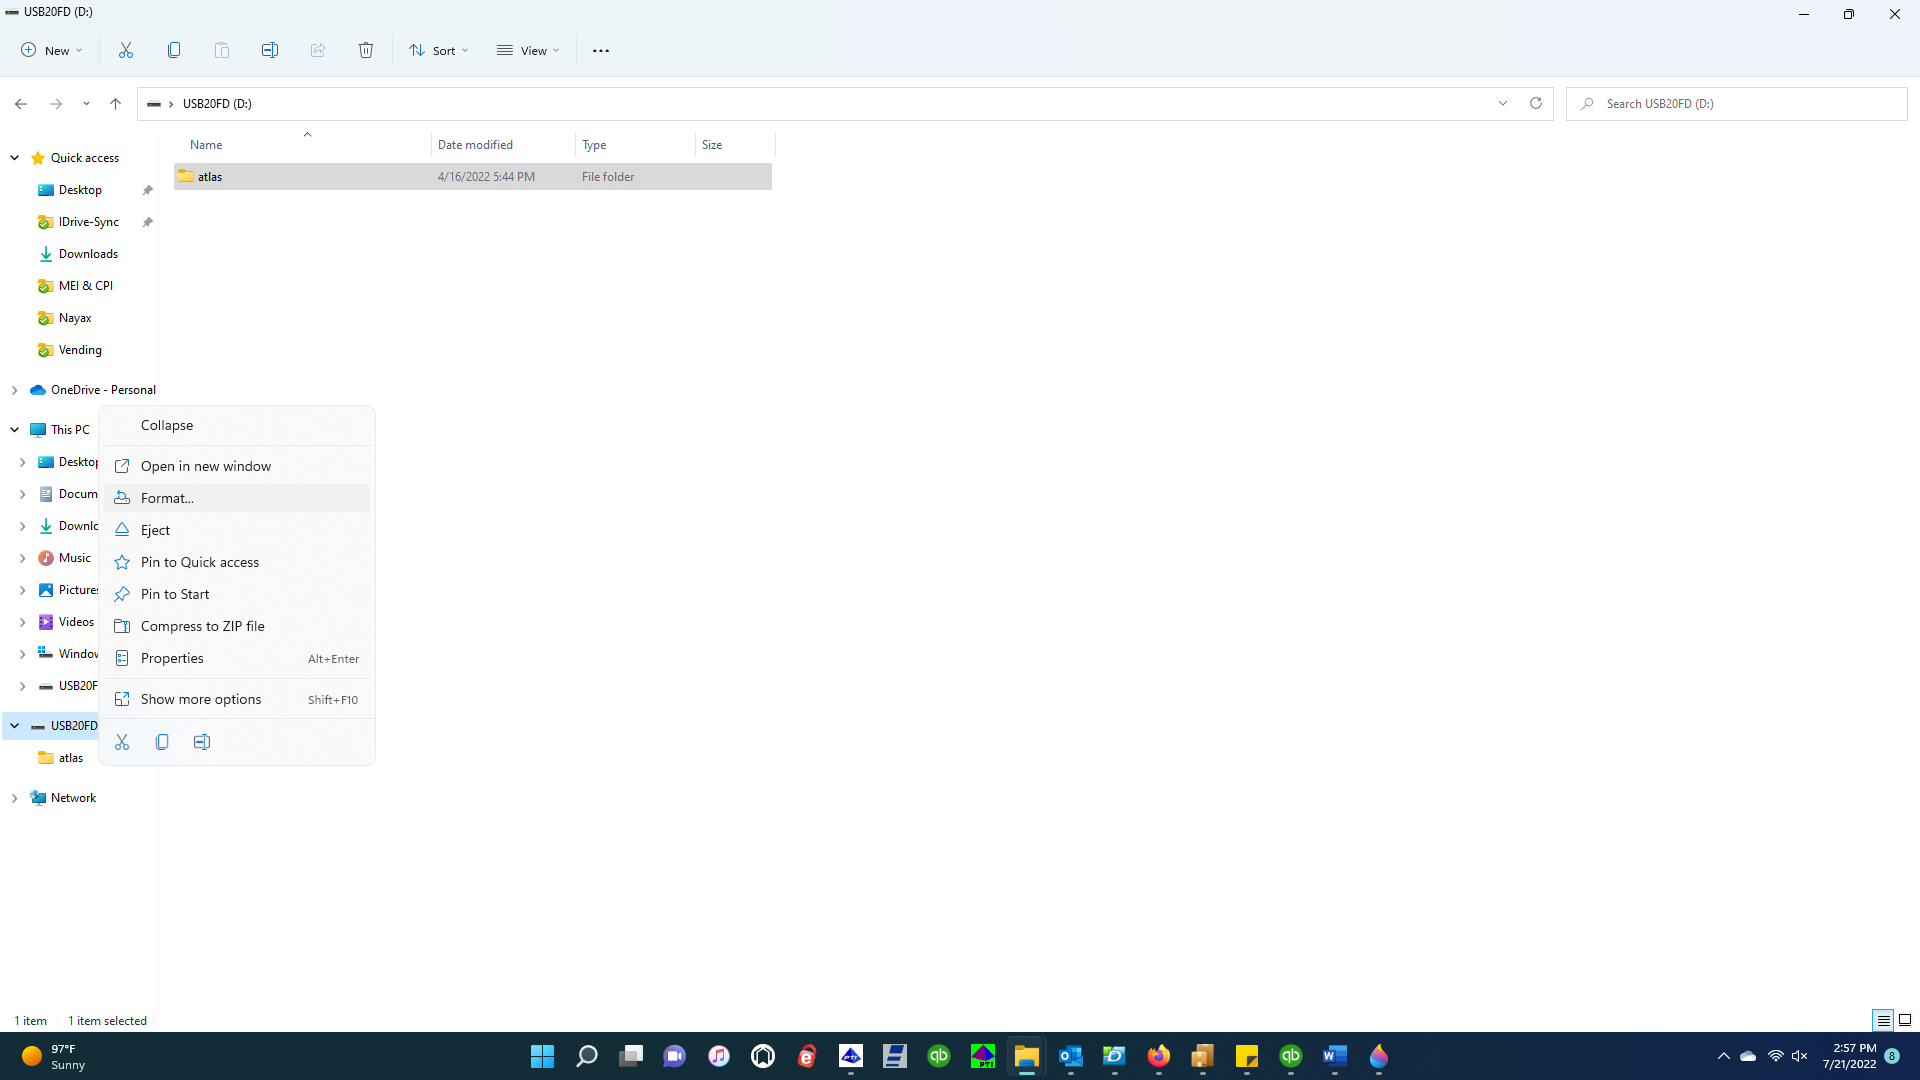
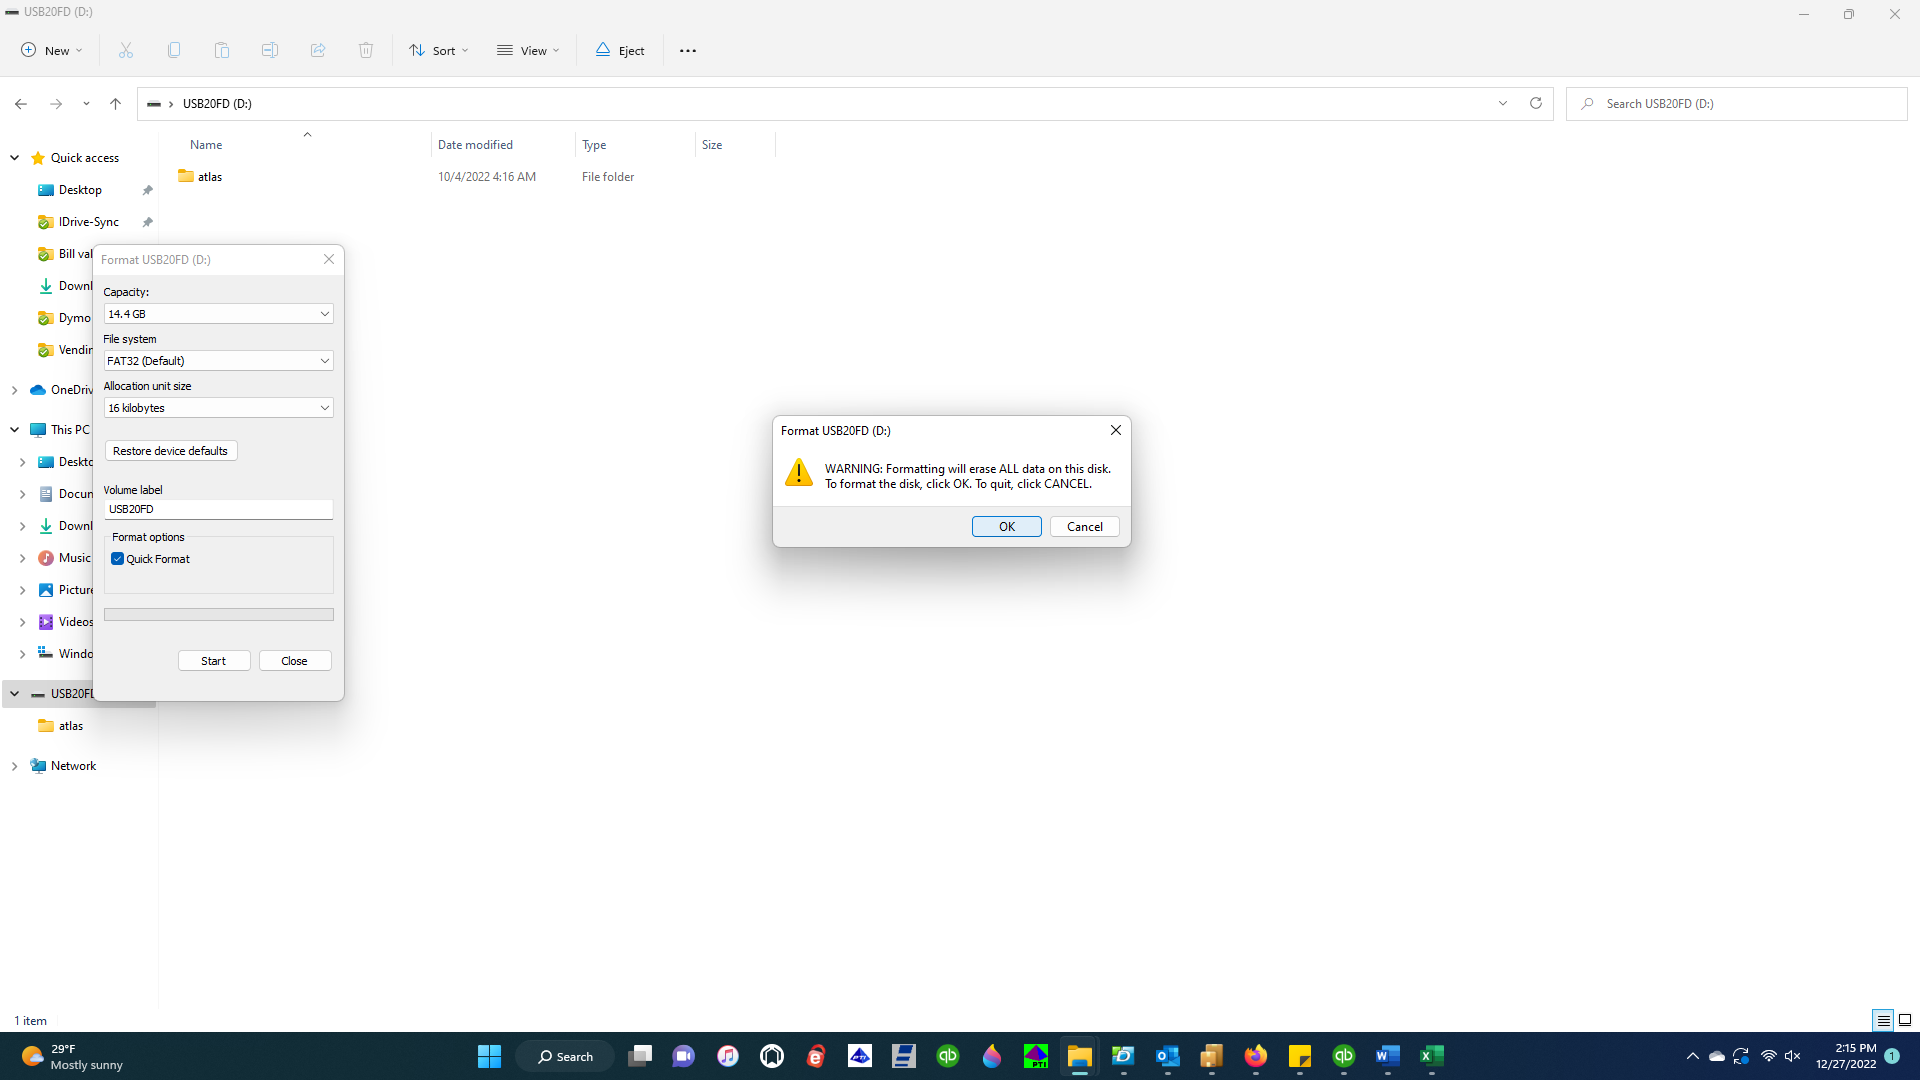
Next, plug your USB drive into your computer, open your File Explorer, right-click on your USB name, then click "Format".
Under "File system" options, next choose "FAT32", and make sure to check the "Quick Format box under "Format options". Next, click "start".
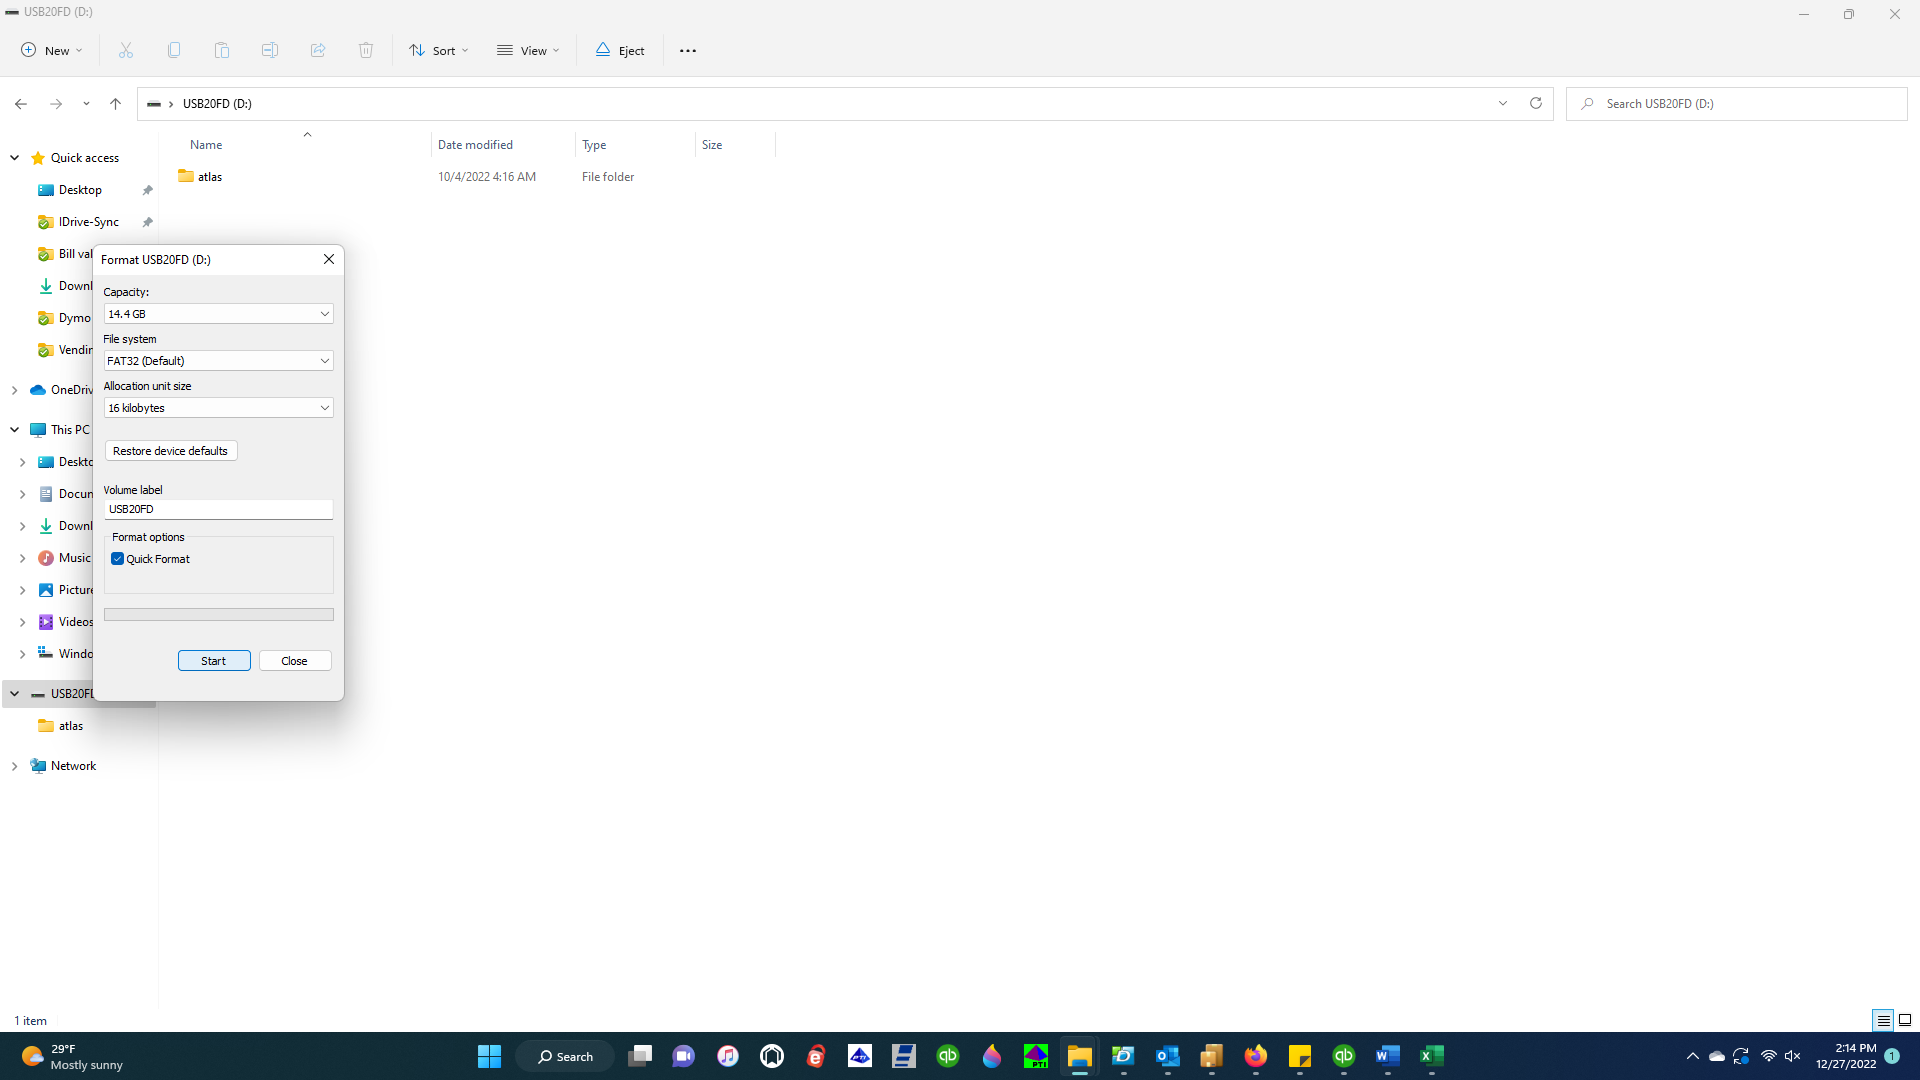
A warning will pop up asking if you want to erase all data on your flash drive. Click "OK". The formatting will quickly occur, after which a box will pop up stating formatting was successful. Acknowledge the prompt, then click "Close" on the bottom right of your format options window which should still be on your screen.
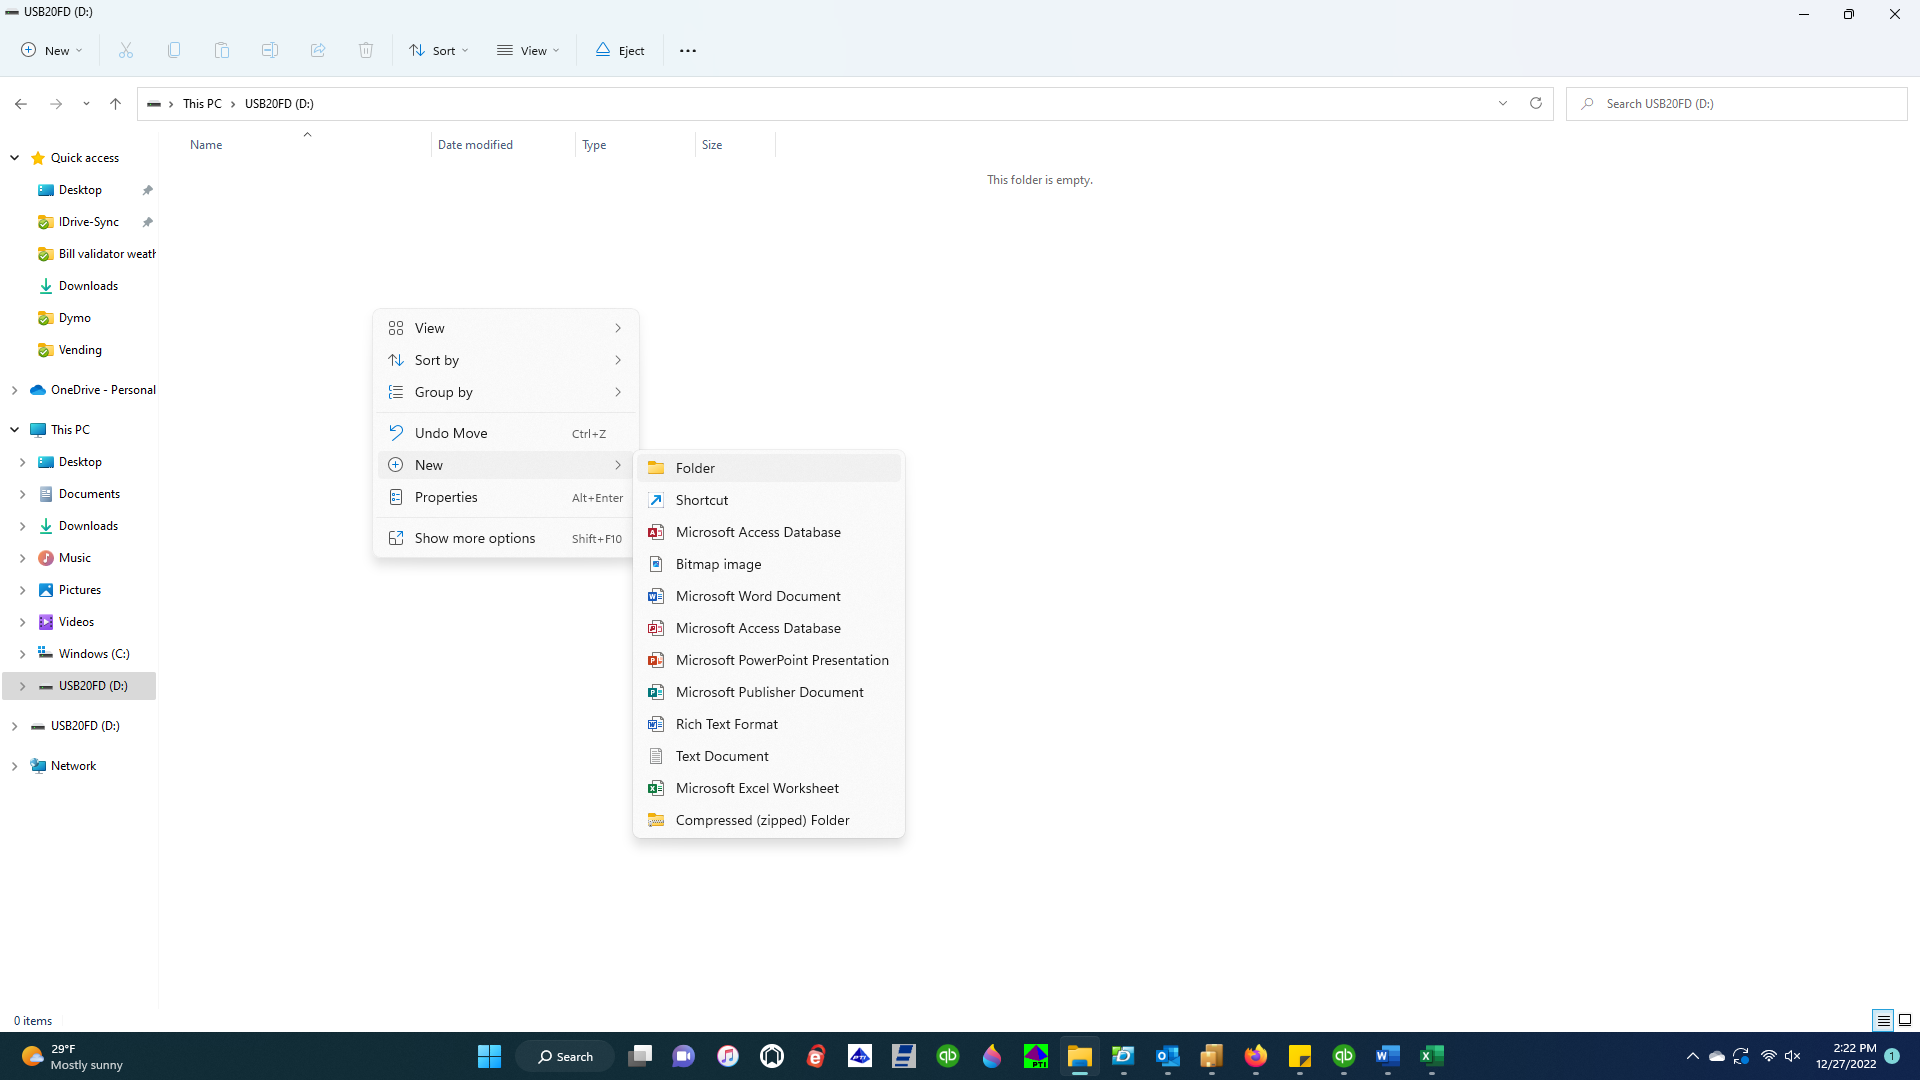
Next, right-click on your USB drive, and from the options that appear, select New>Folder.
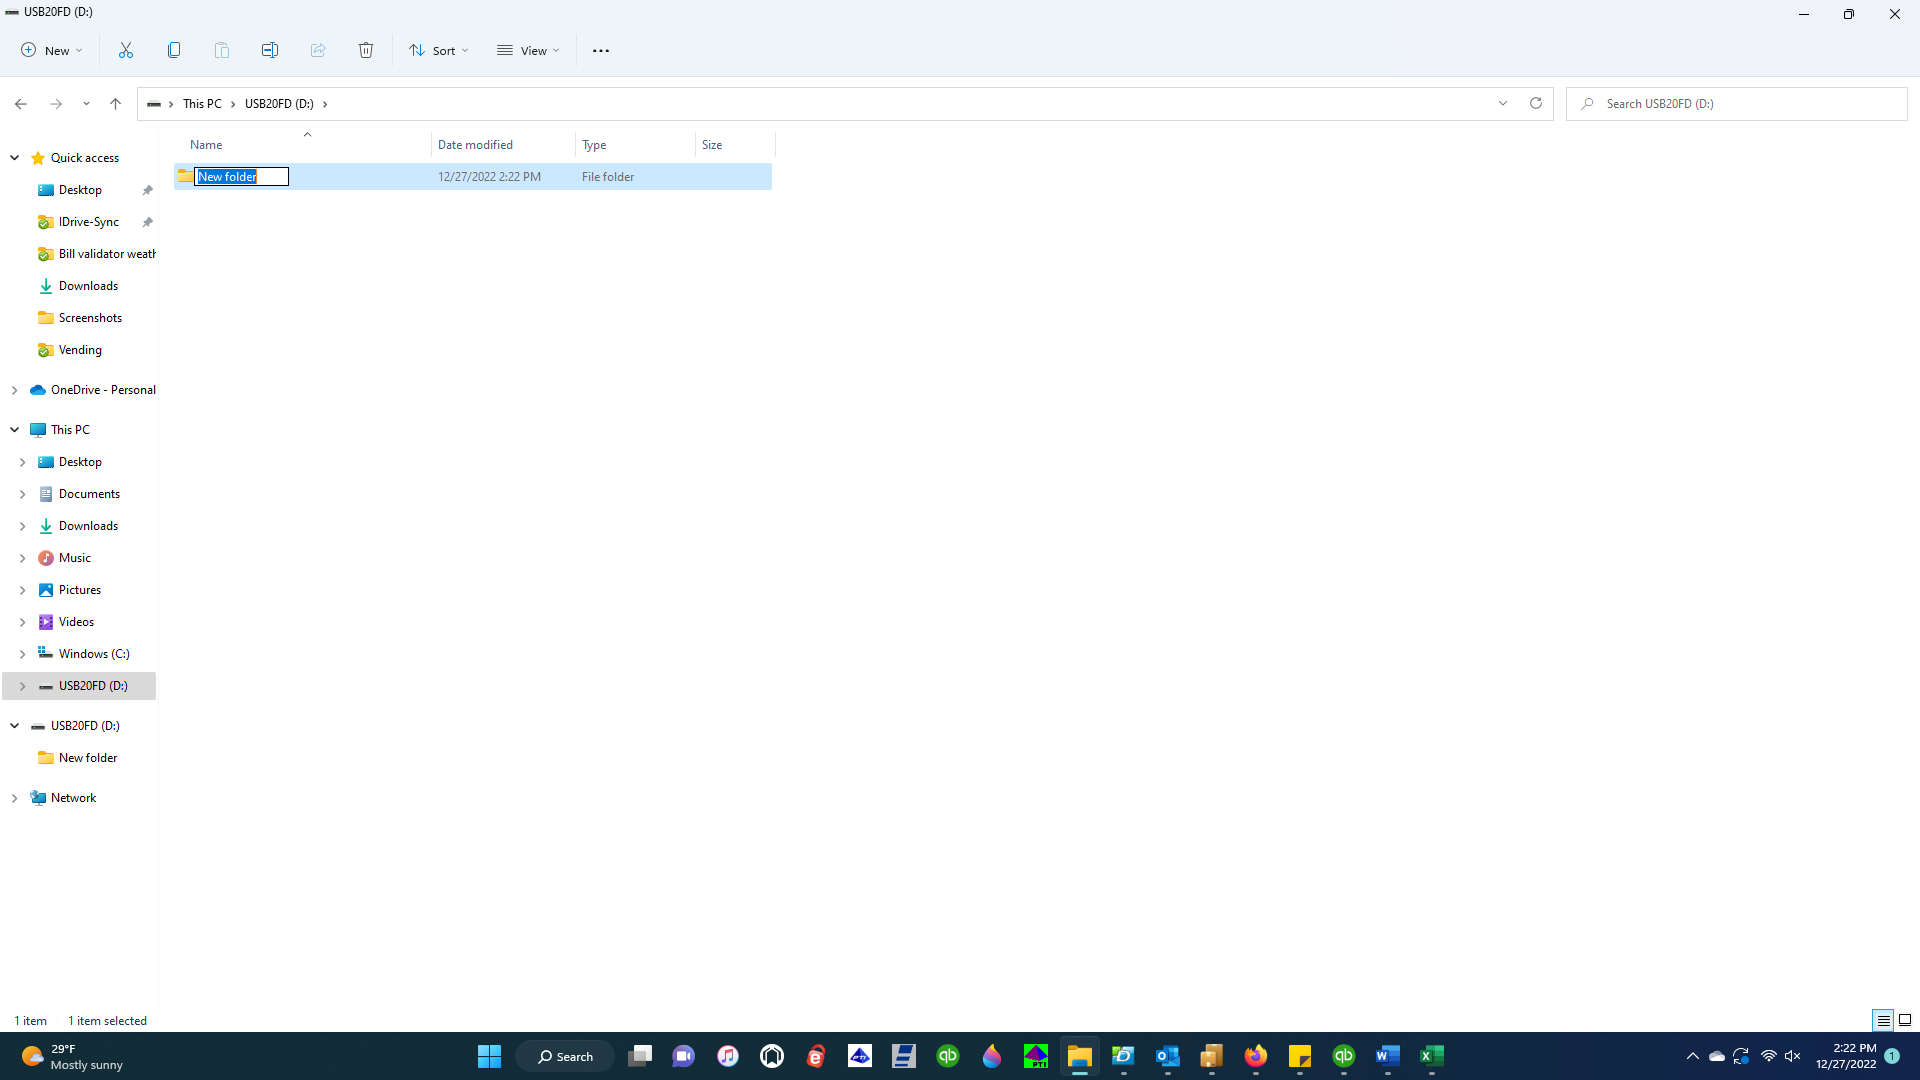
Rename this folder "atlas" (use all lowercase letters).
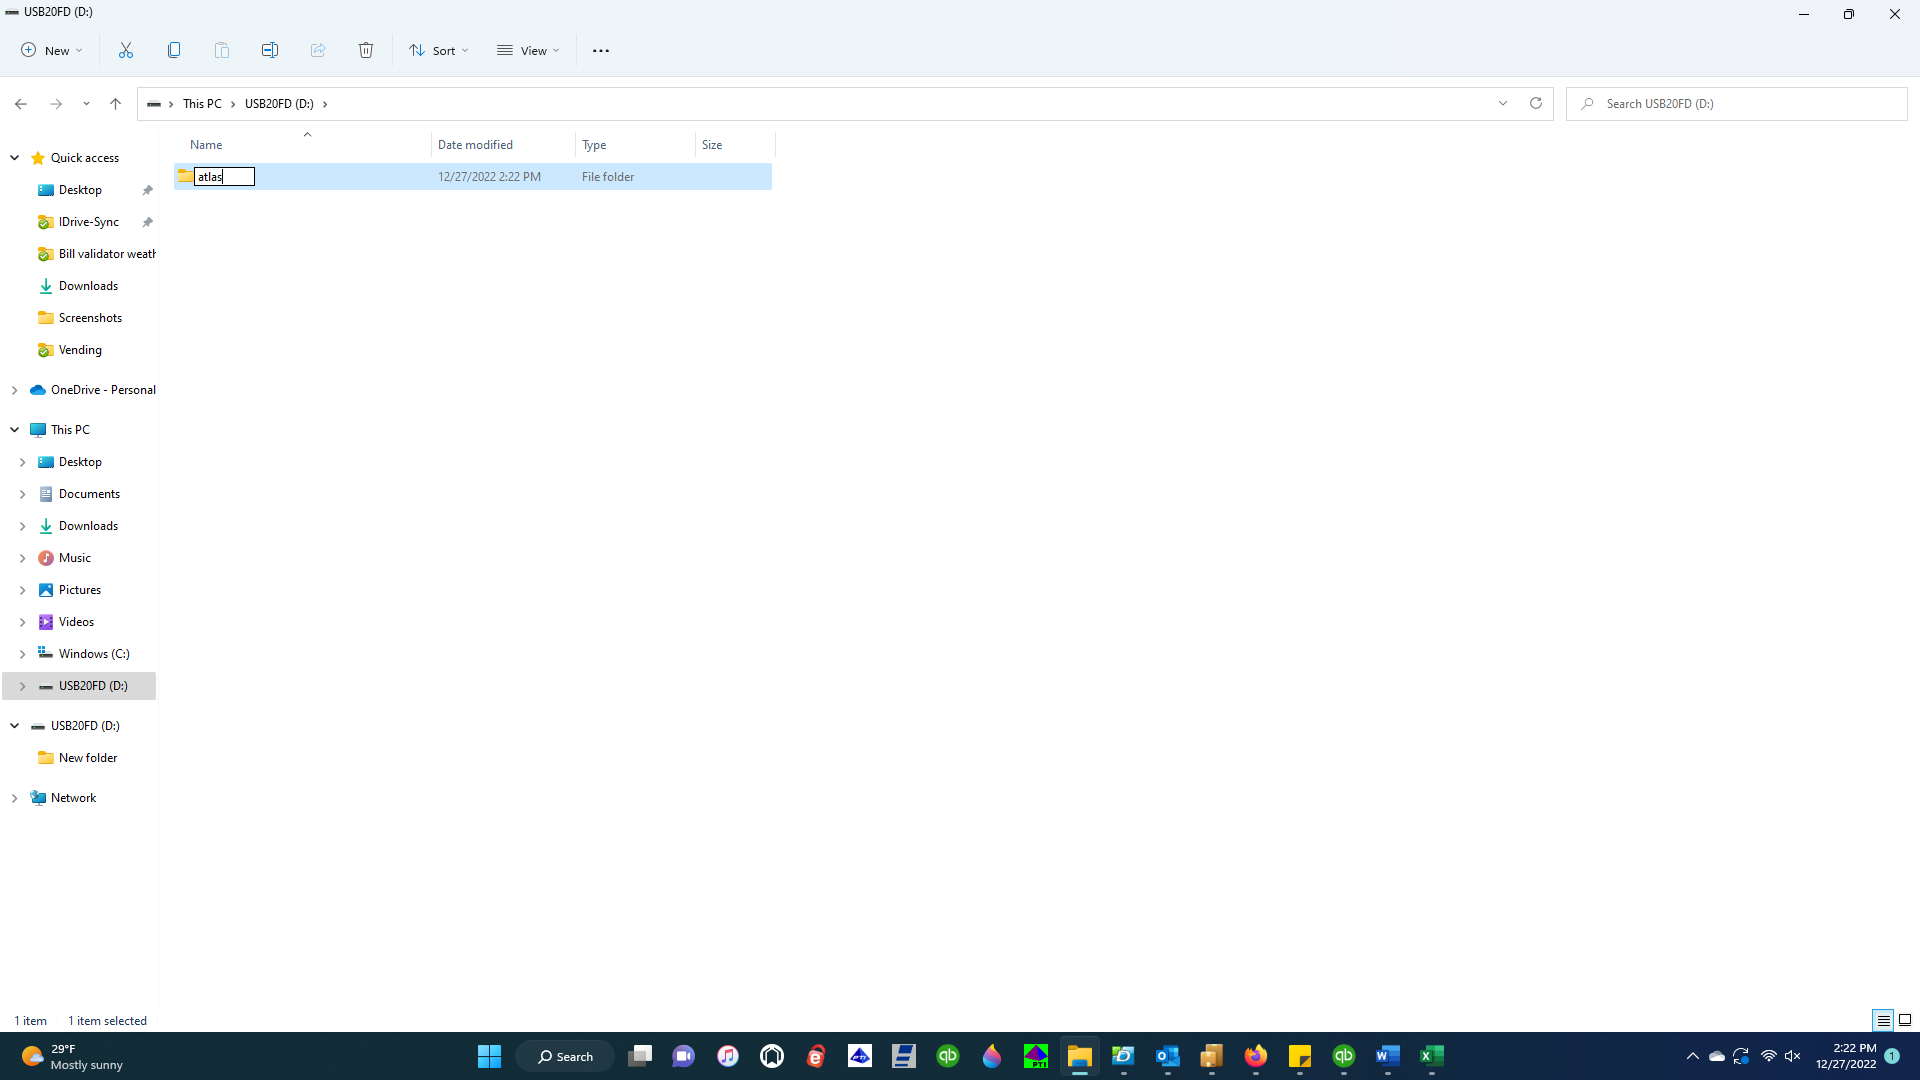
At this point, the folder now named atlas should be the ONLY thing on your USB drive. DO NOT add anything else to this drive except for the software that we will add next so long as you intend to use this drive for updating your vending machines.
Next, you have two potential uses for the software you received from Crane. You can either use it to wipe your old control board completely of all software and settings, and start over with new software (very useful and recommended if you are experiencing board problems, glitches, or any other difficult and elusive problem), or you can simply update the software while saving and preserving all settings and configurations on your machine.
First, we'll address how to completely wipe and reinstall the software. We'll call this the "Update Full" process.
Step one: Open the new folder entitled "atlas" on your flash drive. In our demonstration, this is the screen on the right in the picture below, and as it should be, the atlas folder is completely empty at this point.
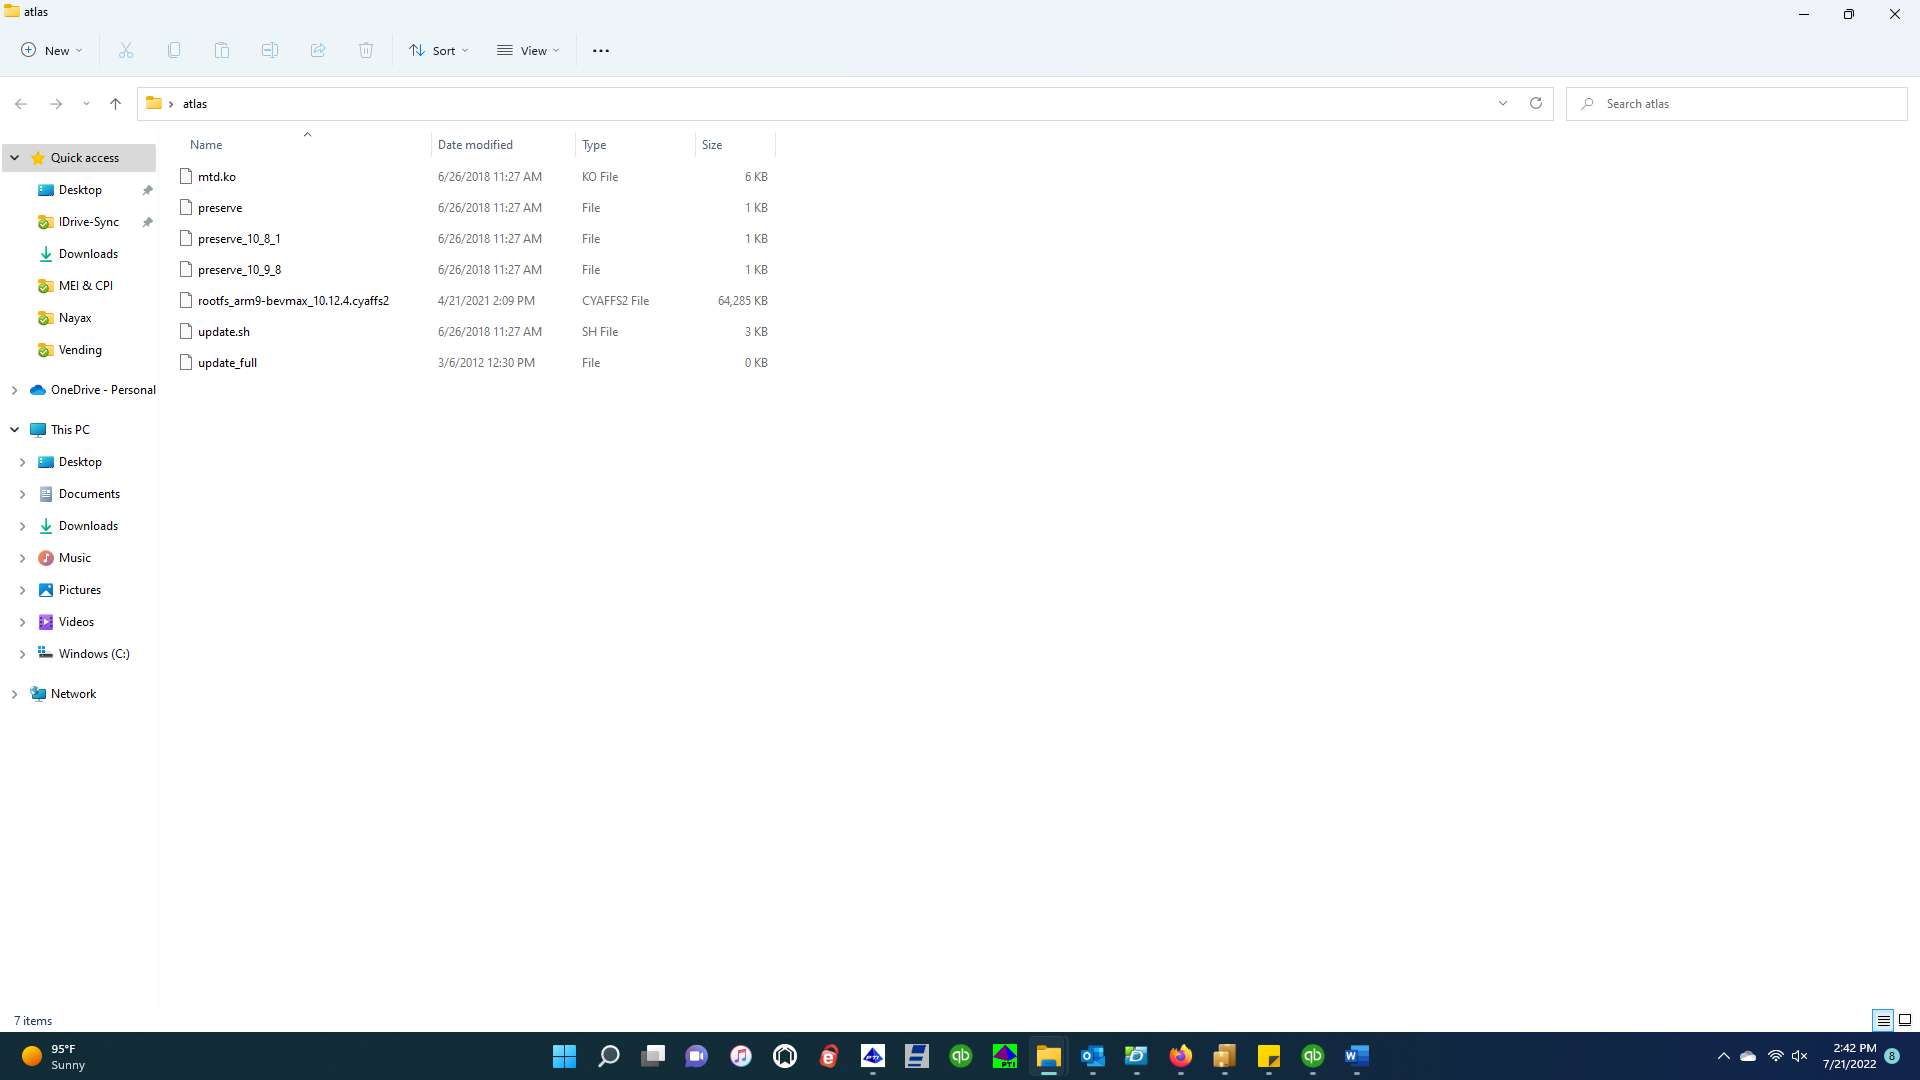
Step two: Open the folder containing the software you received from Crane. It should have the following files in it: an mtd.ko file, three files with "preserve" in the description, a rootfs file with the software version displayed in it (10.12.4 in the example below - this is also referred to as the CYAFFS file, and is the only file of any size, usually 60,000+ KB), an update.sh file, and an update_full file.
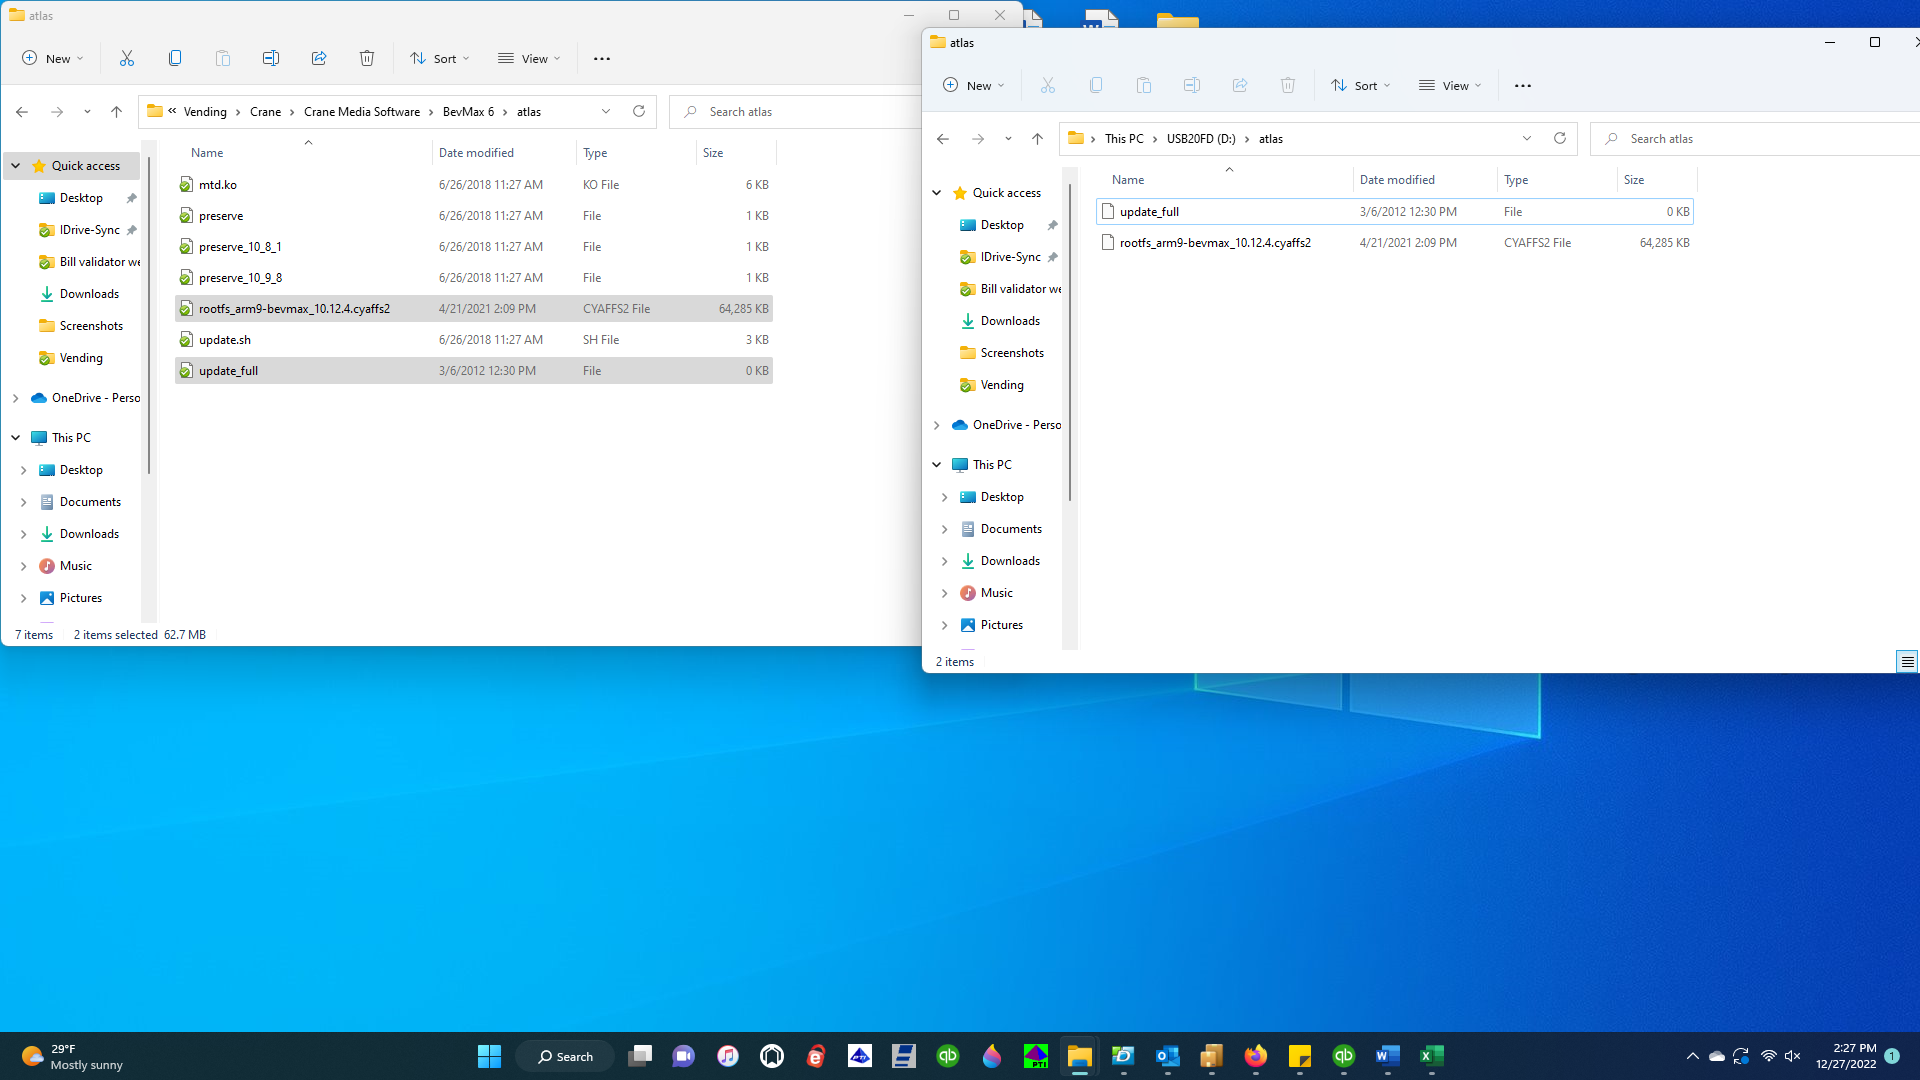
Step three: Move the rootfs or CYAFFS file AND the update_full file to the atlas folder on your USB flash drive. It would be best to copy them to the flash drive so that you still have a copy remaining on your computer. You can do this by holding a right-click, then dragging them to your atlas folder on your flash drive. Once you release the right-click, it will ask you if you want to move or copy them.
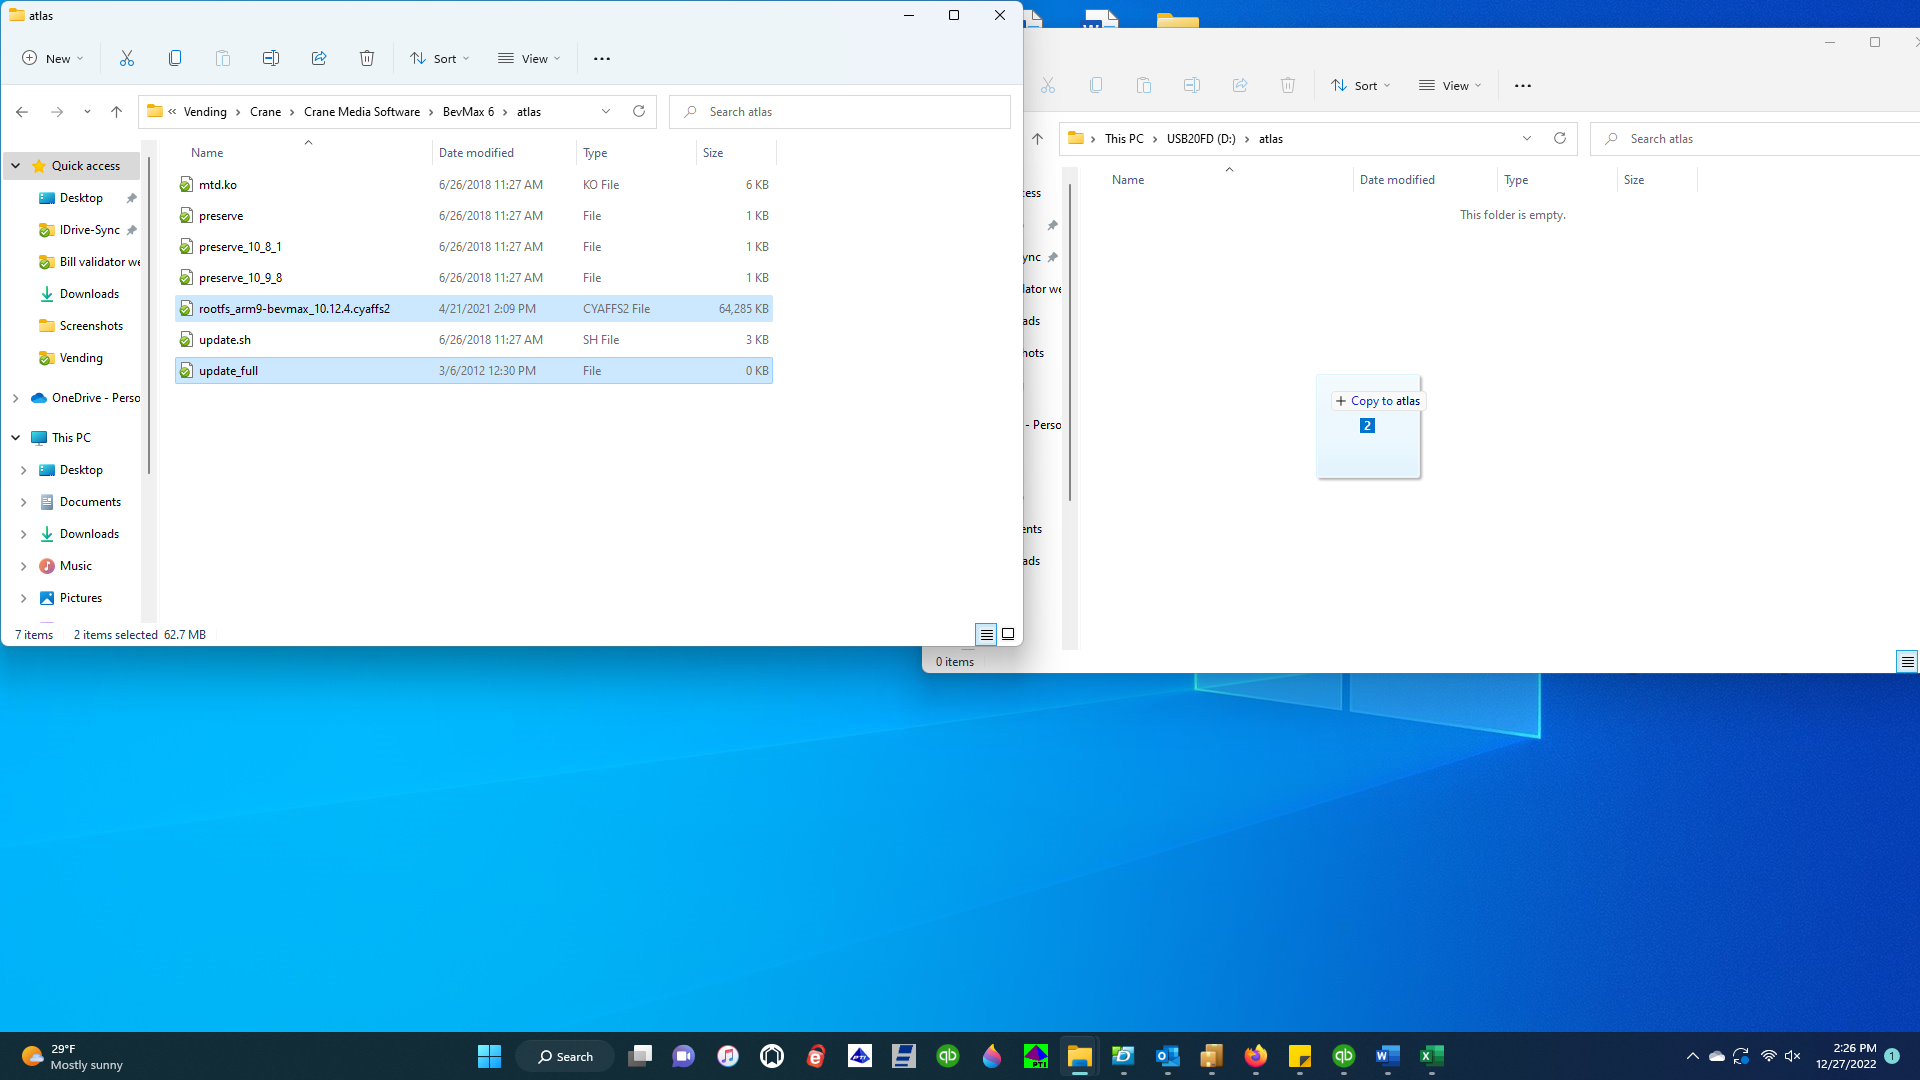
Here is what your atlas folder should have in it once you move those two files (right screen).
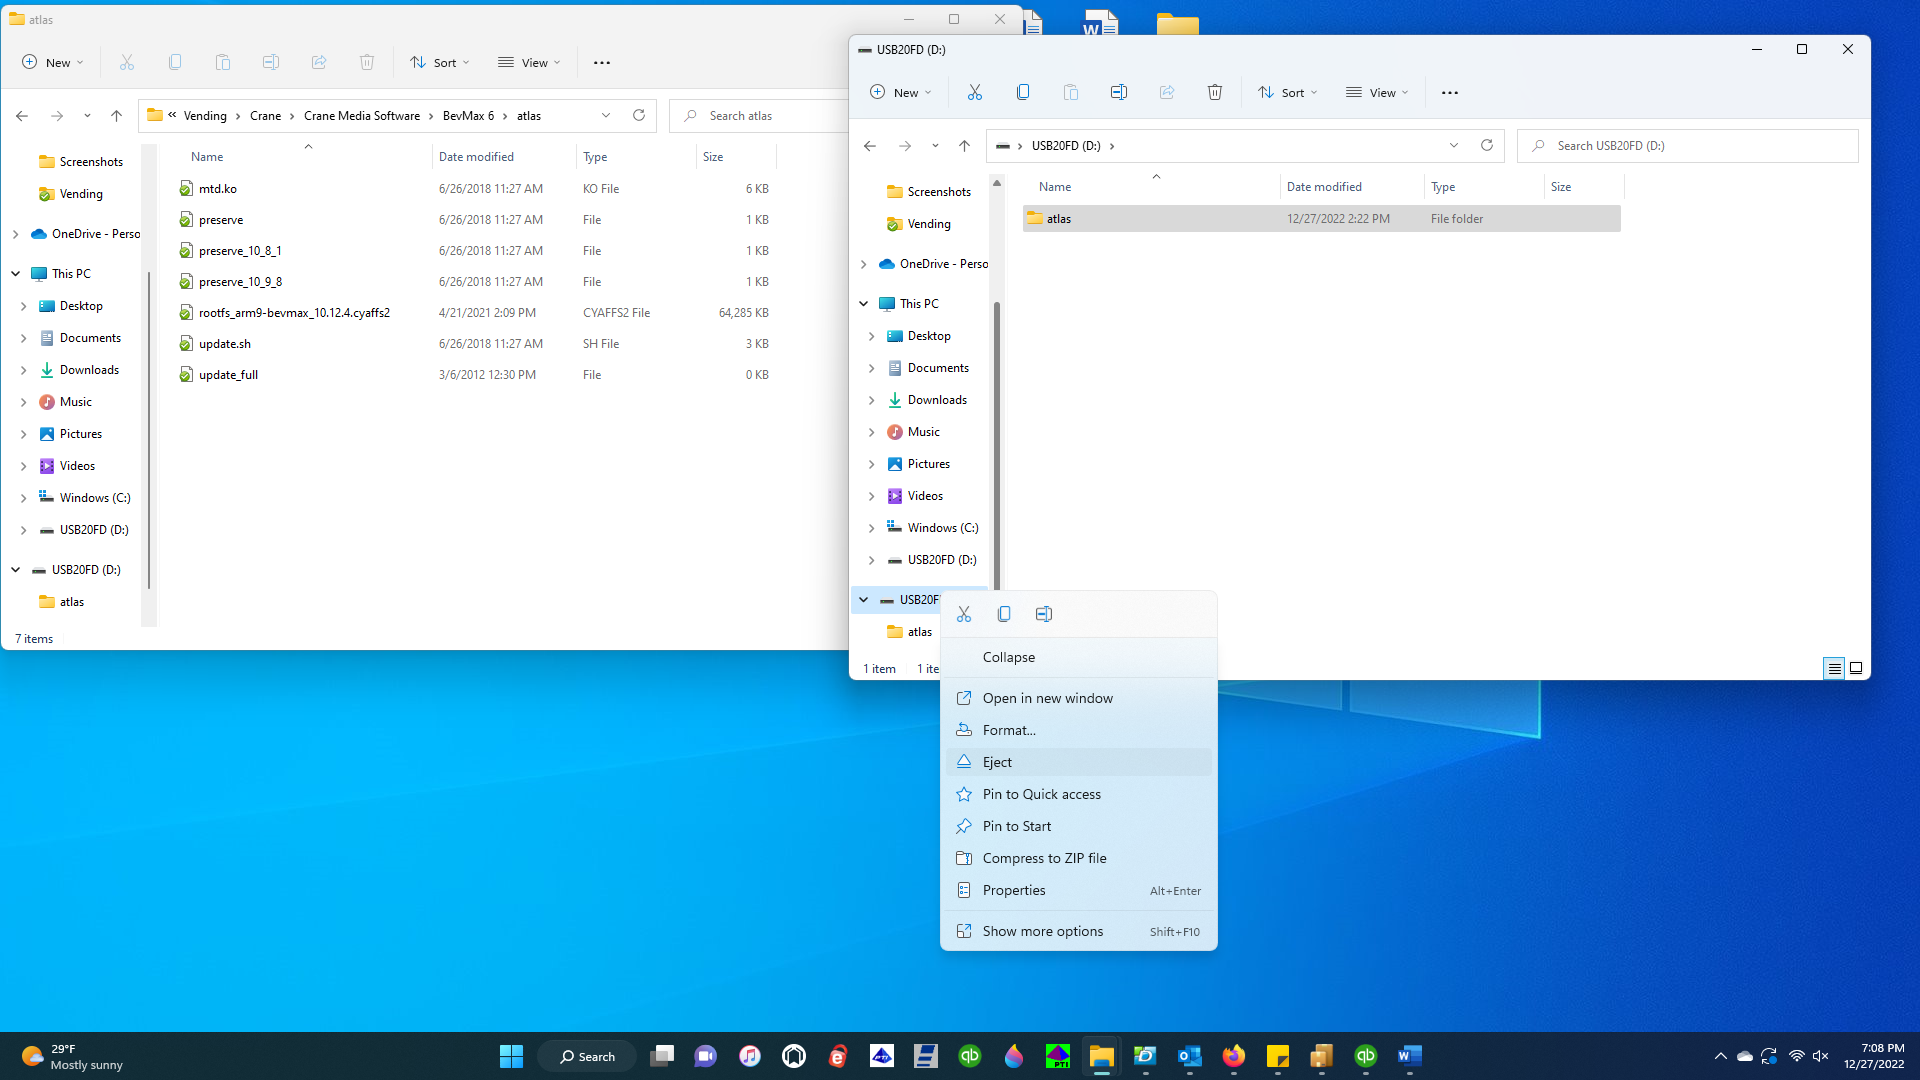
Your USB drive is now ready to use in your vending machine. Right-click on the USB and then click "eject" to safely remove your USB from the computer.
Now let us review the very similar process for updating your software on an Atlas "G" board without losing any of your settings, data, history, or configurations. We'll call this the "Update Preserve" process.
Step one: Open the new folder entitled atlas on your flash drive. In our demonstration, this is the screen on the right in the picture below, and as it should be, the atlas folder is completely empty at this point.
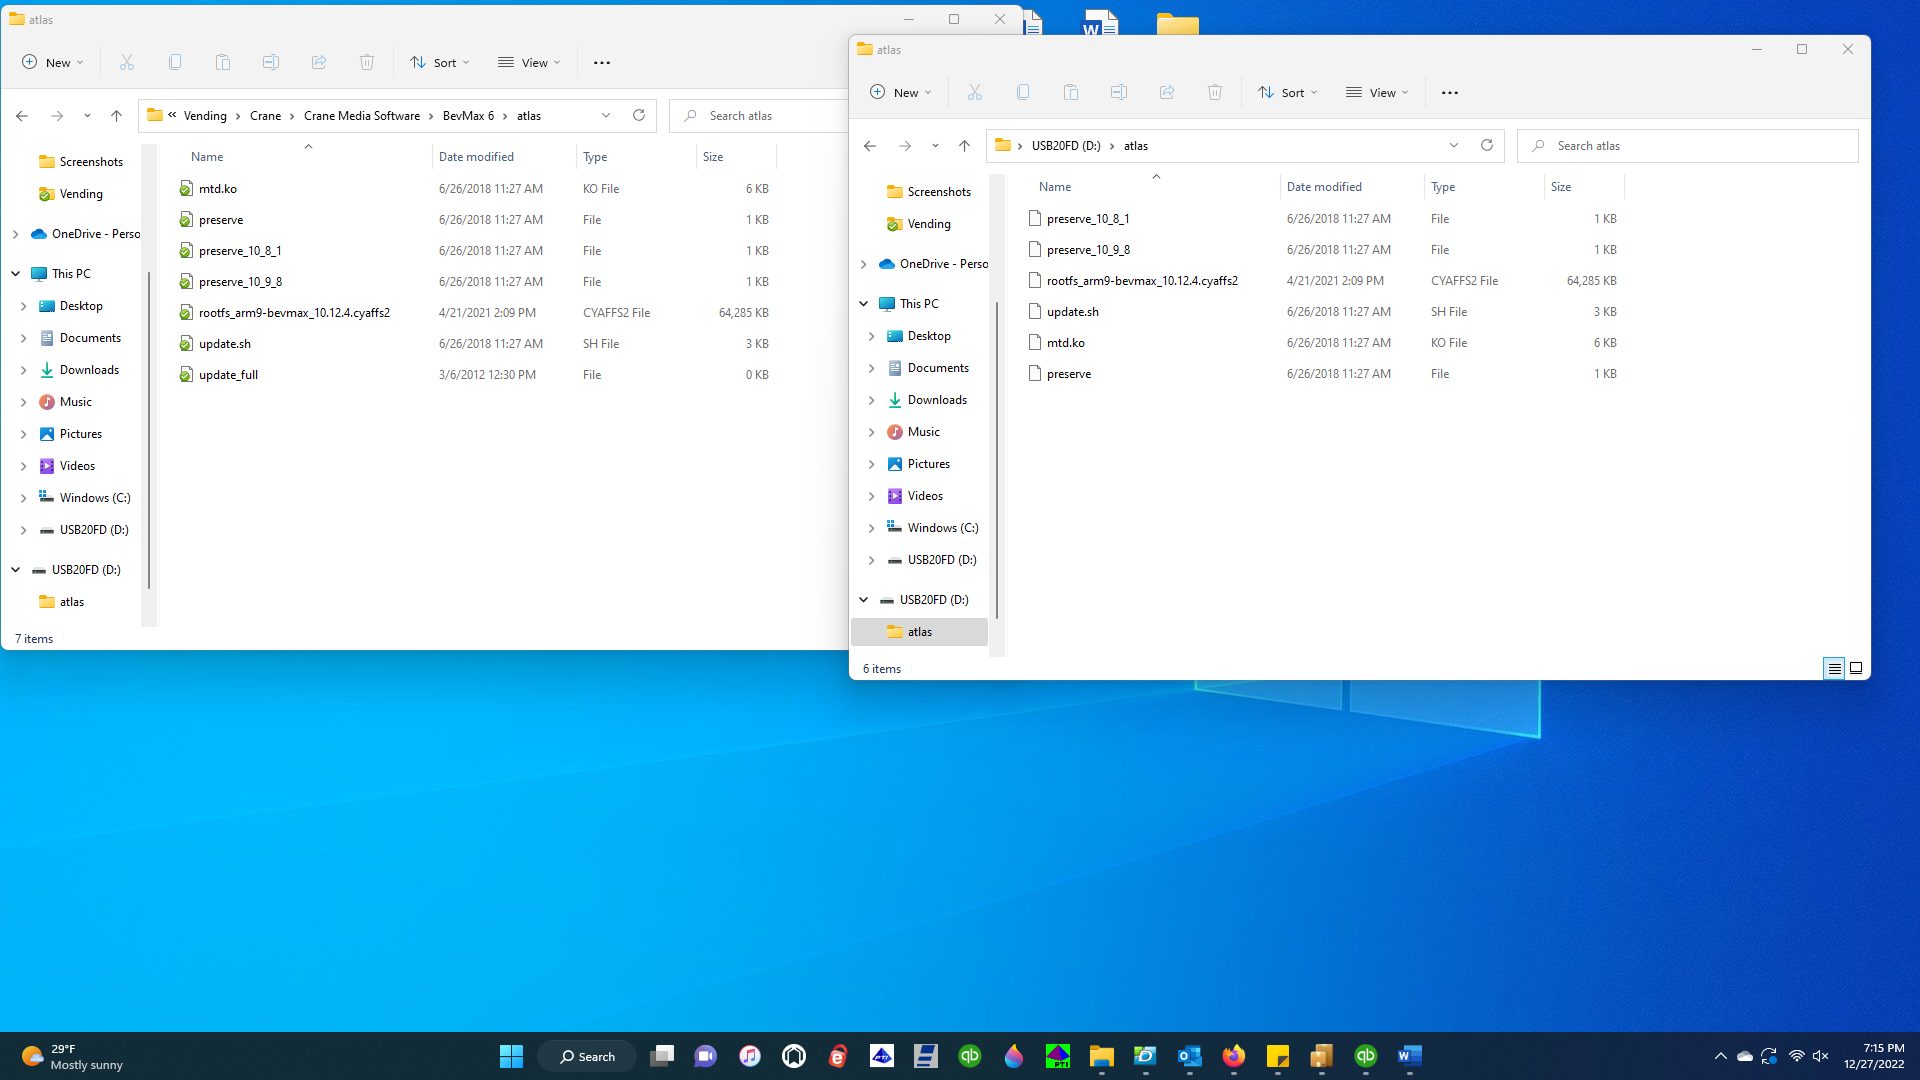
Step two: Open the folder containing the software you received from Crane. It should have the following files in it: an mtd.ko file, three files with "preserve" in the description, a rootfs file with the software version displayed in it (10.12.4 in the example below - this is also referred to as the CYAFFS file, and is the only file of any size, usually 60,000+KB), an update.sh file, and an update_full file.
Step three: Move the mtd.ko file, all three "preserve" files, the rootfs or CYAFFS file, and the update.sh file to the atlas folder on your USB flash drive. It would be best to copy them to the flash drive so that you still have a copy remaining on your computer. You can do this by holding a right-click, then dragging them to your atlas folder on your flash drive. Once you release the right-click, it will ask you if you want to move or copy them.
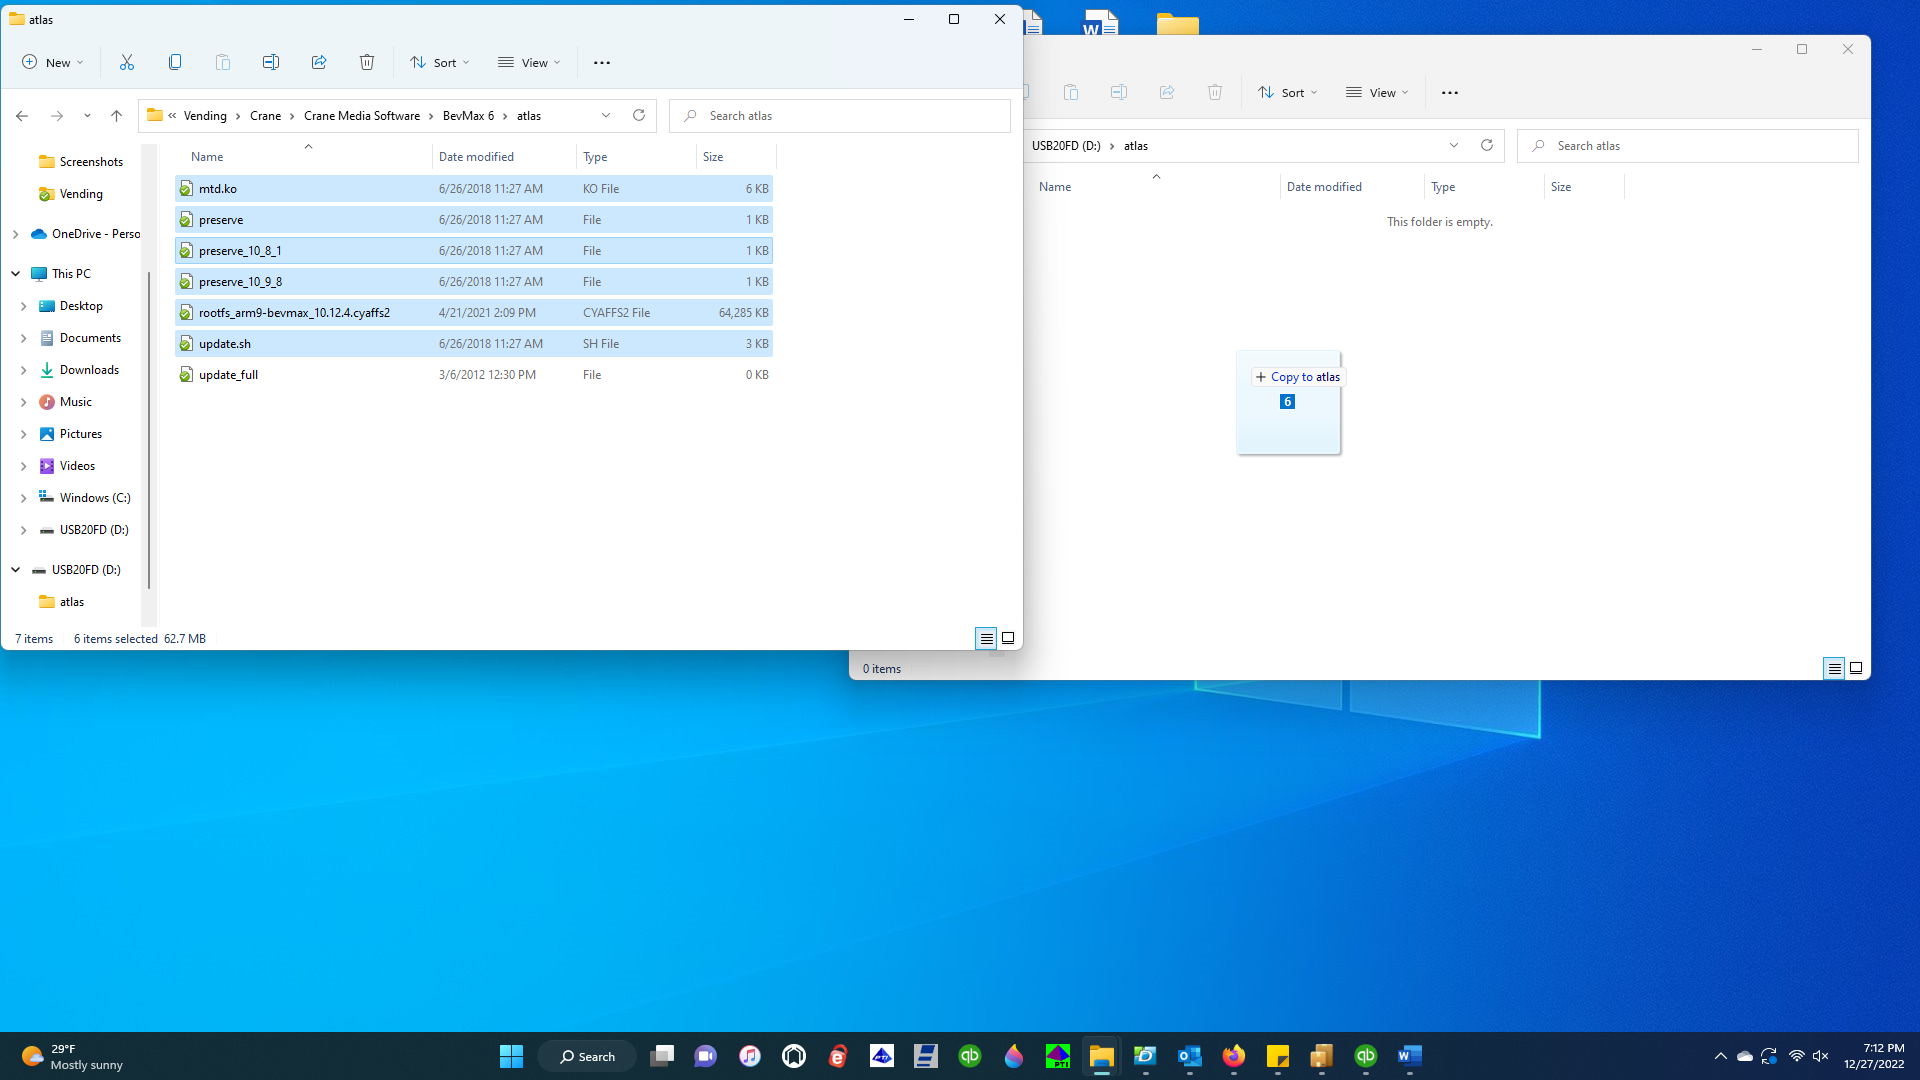
Here is what your atlas folder should have in it once you move those files to your atlas folder (right screen).
Your USB drive is now ready to use in your vending machine. Right-click on the USB and then click "eject" to safely remove your USB from the computer.
With either flash drive configuration we just covered, the next step after you have loaded the software onto the drive is to plug your USB drive into your vending machine's Atlas board.
It is very important that you follow these instructions carefully, as ending up with the wrong combination of software files on your flash drive will potentially corrupt your board, or at the very least, cause any update or wipe attempt to fail. Each of the files you receive from Crane has a specific purpose. The CYAFFS file is the only actual software file you receive. The rest of the files are just command prompts to get the Atlas board in your machine to do certain things. If you mix up commands, for example, if you put the update_full command in the same folder with a preserve command, your Atlas board will not know what to do, and it will either do nothing, or potentially corrupt something.
To use your newly-programmed flash drive, turn your machine OFF, insert your flash drive into USB3 on the Atlas board (it will be the standalone USB port on the board), turn the machine back ON, then wait for the screen to say "Please remove USB from board". Once the USB is removed, the machine will automatically reboot. If you used the update_full option, all your prices and other settings will need to be reprogrammed.
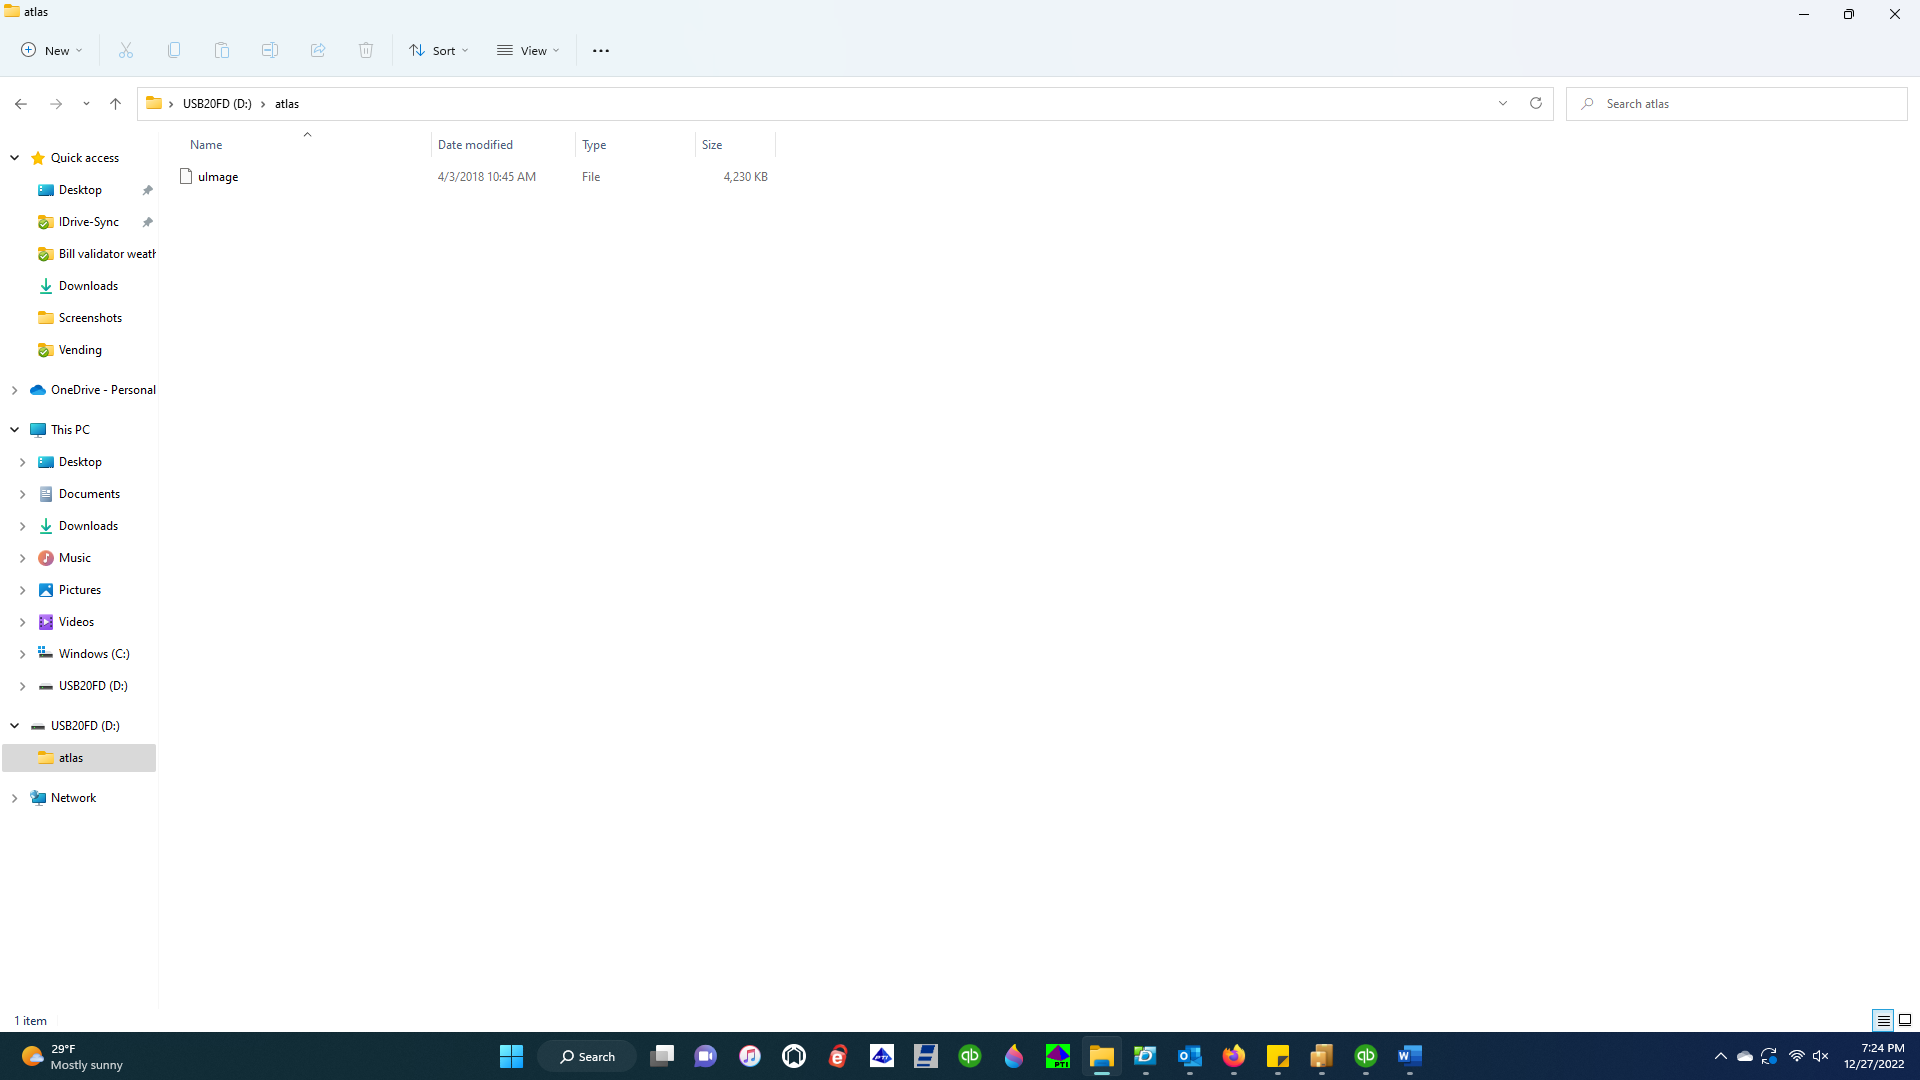
On rare occasions in older machines, you might have to update the kernel on the board to get it to take the latest software. Or, you might also see this message “We boot up from recovery image, please, update Image at mtdblock3 and try to boot up.” If you have either of these problems, here is the process for updating the kernel. The kernel is kind of like a very basic software file on the Atlas board that is necessary for the proper operation of the main software file. If you have to request this from Crane, or if they send it to you, it will be an approximately 4,200 KB file entitled "ulmage".
Move this uImage file into the atlas folder on your formatted USB (instructions for formatting and atlas folder creation are above). There should be NO OTHER FILES in your atlas folder except for the uImage file (see example below). Next, safely eject your USB from the computer.
To update the uImage in your machine, you will need either TWO flash drives, or you will have to remove the USB from the machine and change the software in the atlas folder on it using a laptop or other computer during the middle of this update process on your machine.
To update the kernel (uImage), turn OFF your machine, plug in your flash drive containing on the atlas folder with the uImage file in it into USB3 on your Atlas board. Turn your machine ON, and wait for the screen to tell you to remove the USB.
Once the screen says to remove the USB, DO NOT REMOVE THE USB! Instead, turn the machine OFF. Once the machine shuts down, THEN you can remove the USB from the Atlas board. At this point, you will either need to use a second USB with the correct software already loaded, or you will have to change the software on the USB you just removed from the machine. In either event, you'll need a USB with an atlas folder on it containing two files: the appropriate CYAFFS or rootfs software file for your machine type AND the update_full prompt file. Once those two files, and those two files only are on your drive in your atlas folder, plug the drive back into USB3 on your machine, turn the machine ON, wait for the screen to tell you to remove the USB, remove the USB at that point, and wait for the automatic reboot to occur before customizing price, system, and configuration settings on your machine.
And that's it!